
Ready to start growing your own broccoli sprouts?
This article’s got everything you need, including:
- Why you should eat (and sprout your own) broccoli sprouts
- Simple step-by-step sprouting instructions
- Troubleshooting FAQs
- Printable instructions
Why You Should Start Eating (And Growing) Broccoli Sprouts Now!
Broccoli sprouts contain large amounts of a special compound called sulforaphane, which can be incredibly beneficial to your health.
Health benefits of broccoli sprouts include anti-cancer properties, neuroprotective effects, and more.
Check out this post on the health benefits of broccoli sprouts to learn more about sulforaphane and how eating broccoli sprouts can benefit your health: 6 Incredible Health Benefits of Broccoli Sprouts
Trust me, it’ll make you want to start eating broccoli sprouts every single day.
With that, let’s get into the step-by-step of how to grow your own broccoli sprouts at home!
You’ll want to grow your own sprouts because they’re super cheap to grow from seed, super easy to grow, and super convenient to eat.
How to Grow Broccoli Sprouts
You will need:
- Broccoli sprout seeds (best to buy these in bulk)
- A mason jar (or any glass wide-mouth jar of reasonable size)
- A meshed lid or cheesecloth or any other fine strainer that the seeds won’t slip through
- Optional: A draining rack (I just balance my jar upside-down in at an angle in a bowl to drain)
Directions:
Step 1: Put 2 tablespoons of seeds in your mason jar (or just any bowl) and cover with water to soak. Place in a slightly warm, dark place to soak for about 8 hours.

Step 2: After about 8 hours, drain the water off. Rinse the seeds with fresh water, then drain and leave the jar upside down at an angle to continue draining.
Step 3: For the next couple days, continue to rinse the seeds twice a day (roughly 12 hours apart). Leave jar upside-down to drain after rinsing. Keep the jar in a dark place until the seeds germinate.
Step 4: Once the seeds have sprouted, put the jar on a window sill or under some indirect light exposure.

Step 5: Continue to rinse twice a day.
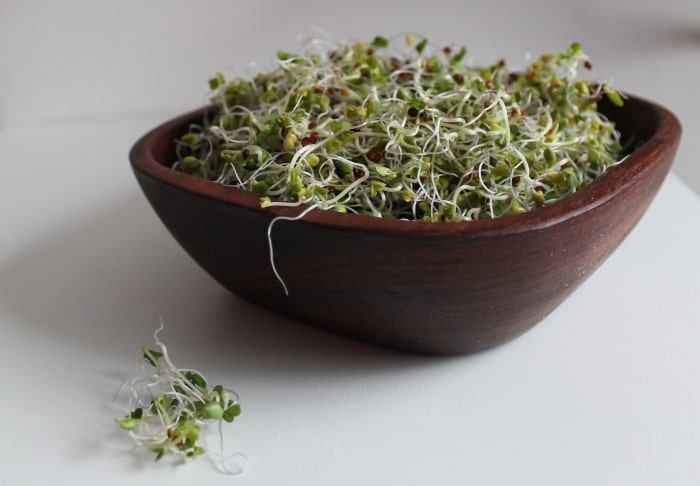
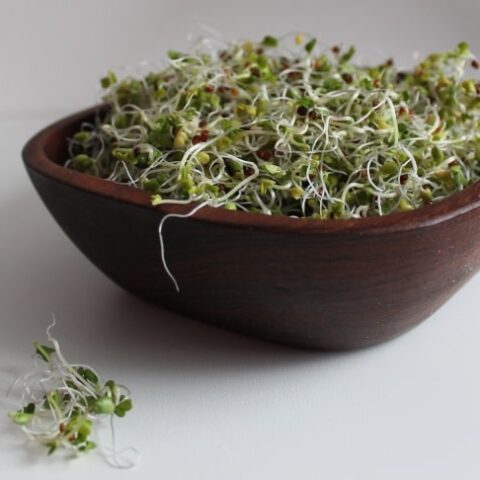
Step 6: Eat sprouts when they reach desired size (should have first set of small green leaves).

After their final rinse and thorough drain, it’s a good idea to lay them out on a paper towel to dry a bit before storing. Broccoli sprouts can be stored in a container in the fridge where they will last for about a week.
Now that you have your very own fresh broccoli sprouts, you can read more about how to best prepare and eat broccoli sprouts here.
Important notes: Make sure to rinse well (filtered water is typically recommended) and drain well in order to prevent fungus from growing. If you see any fungus, the whole batch has to be thrown out unfortunately. The sprouts will grow little fluffy white roots but this is not fungus. Usually you will be able to smell if the sprouts are beginning to rot.
FAQs & Troubleshooting
How long does it take to grow broccoli sprouts?
The whole process from seed to sprout takes about a week. A couple days for the seeds to germinate, and a couple days for the leaves to develop and become green.
How can you tell if your broccoli sprouts are ready?
You can tell your sprouts are ready once they are about an inch long and have a set of nice green leaves. But you can eat broccoli sprouts at any stage really!
How can you tell if your broccoli sprouts are bad?
If the sprouts have gone bad, they will smell like they have gone bad.
The appearance of mold would also indicate that they have gone bad. But take a close look so you don’t mistake mold for the fluffy white roots that the sprouts will grow.
My broccoli sprouts are not growing
To help with germination, make sure you are soaking the seeds and keeping them in a slightly warm place until the seeds start to break open. If they don’t germinate much, it could just be the seeds. Organic seeds generally have consistently high germination rate.
Once the seeds have germinated and have begun to sprout, exposing them to some indirect sunlight will help them develop their small leaves.
There you have it – a superfood you can grow on your counter! Let me know in the comments if you found this guide helpful, and if you enjoy sprouting (and eating!) broccoli sprouts!
Be sure to check out the next post in this broccoli sprout series for different ways to prepare and eat broccoli sprouts, and recipe ideas: How to Eat Broccoli Sprouts (& Maximize Their Health Benefits)
Happy Sprouting!
How to Grow Broccoli Sprouts
Materials
- Broccoli sprout seeds (best to buy these in bulk)
- A mason jar (or any glass wide-mouth jar of reasonable size)
- A meshed lid or cheesecloth or any other fine strainer that the seeds won’t slip through
- Optional: A draining rack (I just balance my jar upside-down in at an angle in a small bowl to drain)
Instructions
- Put 2 tablespoons of seeds in a mason jar and cover with water to soak. Place in a slightly warm, dark place to soak for about 8 hours.
- After about 8 hours, drain the water off. Rinse the seeds with fresh water, then drain and leave the jar upside down at an angle to continue draining.
- For the next couple days, continue to rinse the seeds twice a day (roughly 12 hours apart). Leave jar upside-down to drain after rinsing. Keep the jar in a dark place until the seeds germinate.
- Once the seeds have sprouted, put the jar on a window sill or under some indirect light exposure.
- Continue to rinse twice a day.
- Eat sprouts when they reach desired size (should have first set of small green leaves).
- After their final rinse and drain, the sprouts can be stored in the fridge for up to a week.
Notes
Make sure to rinse well (filtered water is typically recommended) and drain well in order to prevent fungus from growing.
If you see any fungus, unfortunately, the whole batch has to be thrown out. The sprouts will grow little fluffy white roots but this is not fungus.
Usually you will be able to smell if the sprouts are beginning to rot.